atlant108

Auto-translated
Title: Outcast
Game Version: 3.0(3.1)
Map Version: 1.1
Map Type: scenario
Size: 136x136
Dungeon: yes
Number of Players: 6
Size: medium, 136x136
Map Author: Ogo-i
Author Contacts: [email protected], [email protected]
Description:
“My name is Grok. I came to your lands not for plunder and war. Although I belong to the demon race, my blood runs cold. For my composure and indifference to wars and killings, I was exiled from Shio. I have nowhere to go, and I do not expect unconditional trust from the inhabitants of the Middle Earth, but I came here in peace and am confident that my talents can be useful here. I want to earn money by doing what I'm best at since birth – I want to earn it through killing. Yes, it sounds harsh, but I’m sure there are those here who deserve death. Just give me a contract to kill a bandit, undead, or dragon, and a small army, and the problems will be solved. The reward will be gold and earned respect in these lands.”
Author's Comment:
This is a classic RPG map (kill-bring, earn reputation, gain experience, and receive valuable items for completing quests). After creating the campaign 556 Year - Day of Fiery Tears, I wanted to create an RPG map with as much freedom as possible (within the limits of my skills and abilities). However, my knowledge of LUA scripts was clearly insufficient at that time. It still isn't quite enough now, although less noticeably so. In early December 2008, I started working on it. Within a month, the core of this map was created – all the quests (except perhaps a couple of minor ones and final ones) were written, as well as all the principles and main concepts of the map. And after that, work stalled. From New Year until the release date, much less was done, and all for one reason – it became difficult to test (I got tired of playing it over and over again, balancing and fixing bugs), and giving too raw a product to external testers was also not an option. This is how the work on the map dragged on for long six months, and there was a moment when I sincerely believed that I would never present it to the public – that is, to players. However, thanks to the testers, I found the strength in myself and brought the tedious work to its completion. I really hope you like it and brings you joy – I tried hard. And by the way, I wasn’t the only one who tried.
I highly recommend reading the manual before playing (it's in the archive with the map).
Compatibility: The map is compatible with the MegaAI mod but incompatible with the mod that expands the message window.
Special Thanks: ArchWarlock (for creating excellent mods for the map – orc trader, manticore dwelling, leprechaun, opening gates for wizards, etc.);
Psatkha (for buildings that were not in the game – Mausoleum, Mage's House, Crosses, etc.); alexoff, Valex, Franzy (for helping me learn scripting throughout my acquaintance with scripts);
PavliG (for invaluable help in testing and finding many bugs in creepy beta versions),
Gandalf, DeamonSD, Honter (for testing).
Game Objective: You are a demon exiled from Shio for disobedience. To prove that you have come with good intentions, you will have to fulfill the requests of the inhabitants of this Middle Earth. There are three factions in the game (dwarves, elves, and wizards) who will give you tasks. The more quests you complete for a particular faction, the greater the rewards you will receive from it. Of course, at some point in the game, the interests of the factions intersect.
Quests: You can receive assignments from dwarves, elves, and wizards. You can also take on missions from neutrals. Keep in mind that the tasks given to you by the races are something like the main quest, while missions from neutrals are additional quests. Neutrals also have auto-leveling – the difficulty of the task is adjusted to your player's level. Accordingly, the reward for completion is also adjusted (this only applies to gold - bonuses such as artifacts are not adjusted based on auto-leveling).
Money: You receive money for completing quests. The amount of money depends on the complexity of the task and your reputation. The higher your reputation, the more money you will receive (sometimes the amount may increase threefold). When receiving rewards for neutral quests and opening chests, your level also affects the amount of money. You can get money in abandoned mines by defeating the guards. You can also obtain resources in the Dwarven Preserve and exchange them for gold at the market.
Reputation: Almost every quest has two solutions. These are not decisions about whether it’s good or bad. These are decisions about getting a bigger benefit for yourself personally or doing the job better. For well-executed assignments, you receive reputation (you will be shown this with a bright animation above the hero's head), which affects the amount of experience and gold received for completing tasks, the chance of finding valuable items in abandoned mines, receiving a reward from the sphinx, and some other aspects of the game.
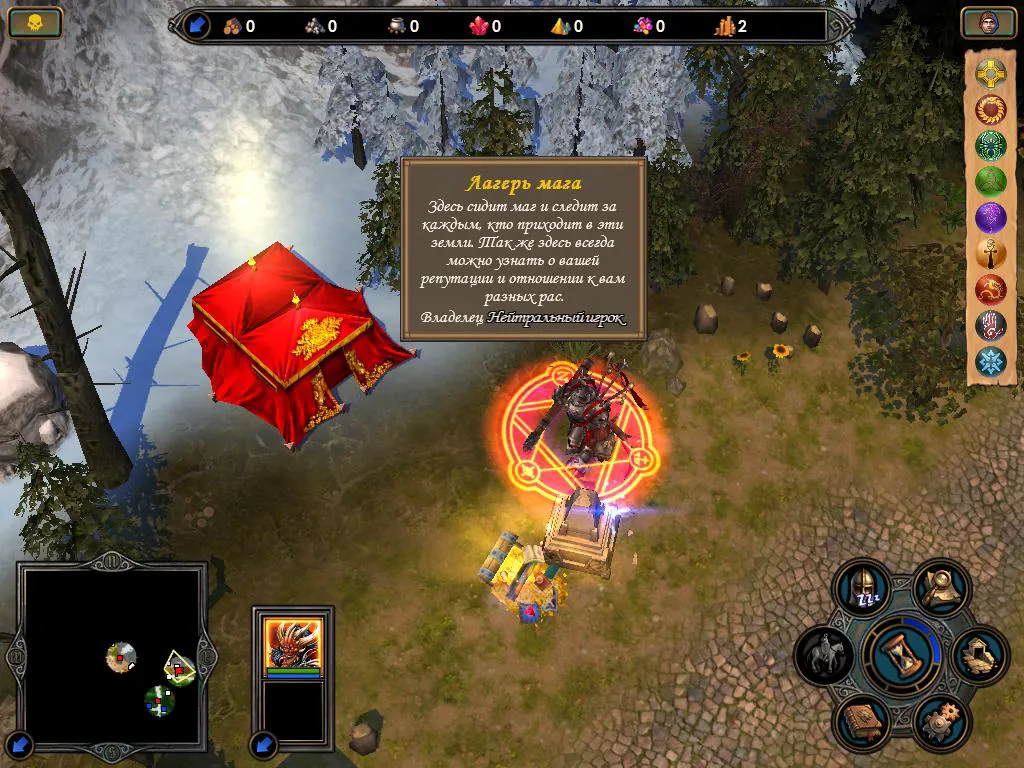
You can find out your reputation from the wizard near the starting garrison.
Experience: You can gain experience by completing main quests. You do not receive experience for completing secondary quests. You also earn experience for destroying creatures in battle, although it is insignificant.
Skills: The "Siege Engines" skill is completely useless in the game – there is nowhere to get siege engines on the map. The "Treasury" ability does not bring 250 gold daily. However, it affects the chance of opening a chest, as well as the amount you find in it. Logistics also affect this. The more developed your logistics, the greater your chances of opening a chest and finding a large sum inside. Skills from the "Logistics" branch do not affect this chance – only the skill itself and the "Treasury" ability.
The "Luck" skill may help you find a valuable artifact in an abandoned mine.
The "Pathfinding" skill will further increase this possibility.
The "Leadership Crown" artifact favorably affects the chances of opening a chest and finding a lot of gold in it, as well as the chances of finding a good artifact in an abandoned mine, but only if you have the appropriate skills.
Artifacts: Artifacts can be obtained by completing quests or in abandoned mines. The higher the level of danger of the mine (dangerous, extremely dangerous, and extraordinarily dangerous) and the higher your luck skill and reputation, the greater the chance of getting a good artifact. You can also obtain artifacts in the Dragon Utopia. I advise you not to rush to sell them. Shackles of Inevitability and Ring of Sinners, if they fall into your hands, these artifacts may play an important role in the plot.
Game Version: 3.0(3.1)
Map Version: 1.1
Map Type: scenario
Size: 136x136
Dungeon: yes
Number of Players: 6
Size: medium, 136x136
Map Author: Ogo-i
Author Contacts: [email protected], [email protected]
Description:
“My name is Grok. I came to your lands not for plunder and war. Although I belong to the demon race, my blood runs cold. For my composure and indifference to wars and killings, I was exiled from Shio. I have nowhere to go, and I do not expect unconditional trust from the inhabitants of the Middle Earth, but I came here in peace and am confident that my talents can be useful here. I want to earn money by doing what I'm best at since birth – I want to earn it through killing. Yes, it sounds harsh, but I’m sure there are those here who deserve death. Just give me a contract to kill a bandit, undead, or dragon, and a small army, and the problems will be solved. The reward will be gold and earned respect in these lands.”
Author's Comment:
This is a classic RPG map (kill-bring, earn reputation, gain experience, and receive valuable items for completing quests). After creating the campaign 556 Year - Day of Fiery Tears, I wanted to create an RPG map with as much freedom as possible (within the limits of my skills and abilities). However, my knowledge of LUA scripts was clearly insufficient at that time. It still isn't quite enough now, although less noticeably so. In early December 2008, I started working on it. Within a month, the core of this map was created – all the quests (except perhaps a couple of minor ones and final ones) were written, as well as all the principles and main concepts of the map. And after that, work stalled. From New Year until the release date, much less was done, and all for one reason – it became difficult to test (I got tired of playing it over and over again, balancing and fixing bugs), and giving too raw a product to external testers was also not an option. This is how the work on the map dragged on for long six months, and there was a moment when I sincerely believed that I would never present it to the public – that is, to players. However, thanks to the testers, I found the strength in myself and brought the tedious work to its completion. I really hope you like it and brings you joy – I tried hard. And by the way, I wasn’t the only one who tried.
I highly recommend reading the manual before playing (it's in the archive with the map).
Compatibility: The map is compatible with the MegaAI mod but incompatible with the mod that expands the message window.
Special Thanks: ArchWarlock (for creating excellent mods for the map – orc trader, manticore dwelling, leprechaun, opening gates for wizards, etc.);
Psatkha (for buildings that were not in the game – Mausoleum, Mage's House, Crosses, etc.); alexoff, Valex, Franzy (for helping me learn scripting throughout my acquaintance with scripts);
PavliG (for invaluable help in testing and finding many bugs in creepy beta versions),
Gandalf, DeamonSD, Honter (for testing).
Game Objective: You are a demon exiled from Shio for disobedience. To prove that you have come with good intentions, you will have to fulfill the requests of the inhabitants of this Middle Earth. There are three factions in the game (dwarves, elves, and wizards) who will give you tasks. The more quests you complete for a particular faction, the greater the rewards you will receive from it. Of course, at some point in the game, the interests of the factions intersect.
Quests: You can receive assignments from dwarves, elves, and wizards. You can also take on missions from neutrals. Keep in mind that the tasks given to you by the races are something like the main quest, while missions from neutrals are additional quests. Neutrals also have auto-leveling – the difficulty of the task is adjusted to your player's level. Accordingly, the reward for completion is also adjusted (this only applies to gold - bonuses such as artifacts are not adjusted based on auto-leveling).
Money: You receive money for completing quests. The amount of money depends on the complexity of the task and your reputation. The higher your reputation, the more money you will receive (sometimes the amount may increase threefold). When receiving rewards for neutral quests and opening chests, your level also affects the amount of money. You can get money in abandoned mines by defeating the guards. You can also obtain resources in the Dwarven Preserve and exchange them for gold at the market.
Reputation: Almost every quest has two solutions. These are not decisions about whether it’s good or bad. These are decisions about getting a bigger benefit for yourself personally or doing the job better. For well-executed assignments, you receive reputation (you will be shown this with a bright animation above the hero's head), which affects the amount of experience and gold received for completing tasks, the chance of finding valuable items in abandoned mines, receiving a reward from the sphinx, and some other aspects of the game.
You can find out your reputation from the wizard near the starting garrison.
Experience: You can gain experience by completing main quests. You do not receive experience for completing secondary quests. You also earn experience for destroying creatures in battle, although it is insignificant.
Skills: The "Siege Engines" skill is completely useless in the game – there is nowhere to get siege engines on the map. The "Treasury" ability does not bring 250 gold daily. However, it affects the chance of opening a chest, as well as the amount you find in it. Logistics also affect this. The more developed your logistics, the greater your chances of opening a chest and finding a large sum inside. Skills from the "Logistics" branch do not affect this chance – only the skill itself and the "Treasury" ability.
The "Luck" skill may help you find a valuable artifact in an abandoned mine.
The "Pathfinding" skill will further increase this possibility.
The "Leadership Crown" artifact favorably affects the chances of opening a chest and finding a lot of gold in it, as well as the chances of finding a good artifact in an abandoned mine, but only if you have the appropriate skills.
Artifacts: Artifacts can be obtained by completing quests or in abandoned mines. The higher the level of danger of the mine (dangerous, extremely dangerous, and extraordinarily dangerous) and the higher your luck skill and reputation, the greater the chance of getting a good artifact. You can also obtain artifacts in the Dragon Utopia. I advise you not to rush to sell them. Shackles of Inevitability and Ring of Sinners, if they fall into your hands, these artifacts may play an important role in the plot.
 AstralLein