Gynnar

Auto-translated
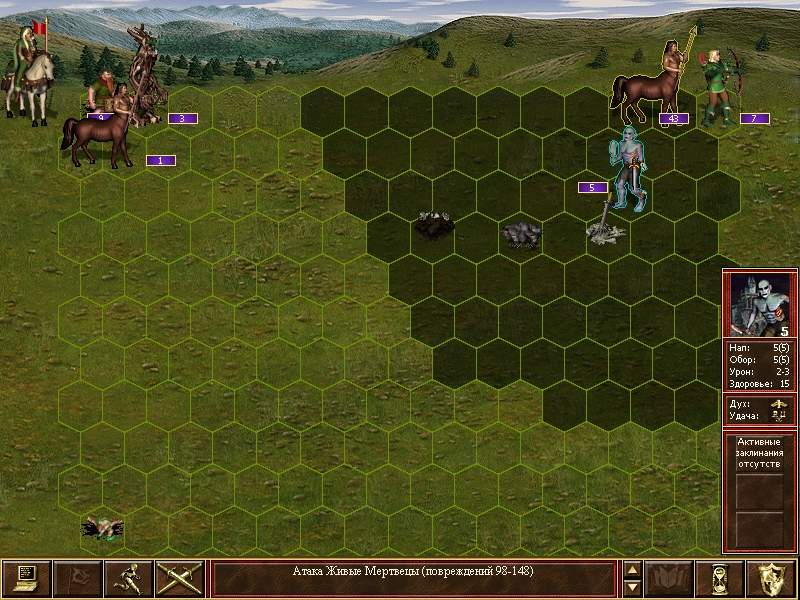
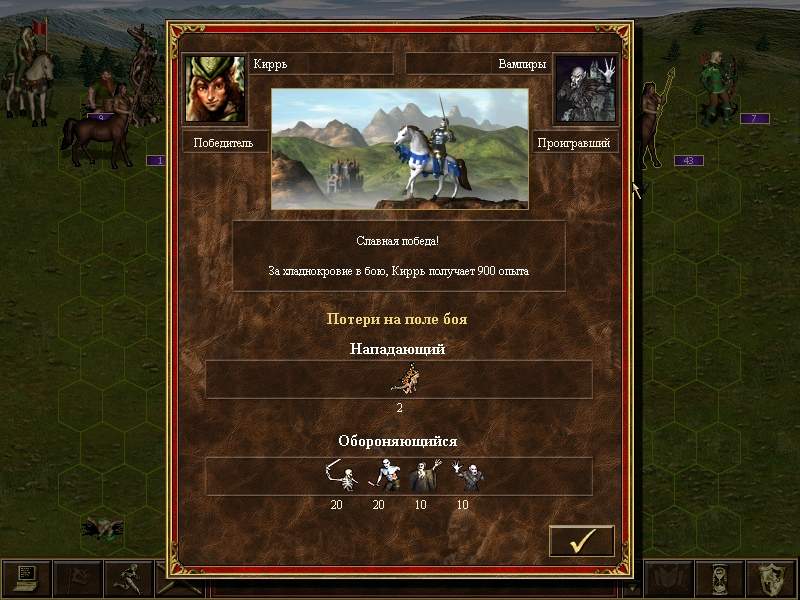
Taking a maximum crypt playing as swamp on the first day of the game (author-Forrest)
Here is the method for swamp.
Tazar level 1. army: gnoll - fly - gnoll - 20 simple lizards - 43 gnolls -
gnoll - fly
In a max crypt on swamp, you lose 2 lizards, 8-12 gnolls, and two flies.
1st round: fly with the flies to the vamps and witches. They are killed by the 1st gnoll to the vamp, and 3rd and 6th to the rags (thus ensuring 2 rounds of vamps standing in place and 3 rounds for witches). With gnolls, wait and kill a pack of approaching skels (2-4 remain). Lizards into vamps.
2nd round: shoot at vamps. Gnolls wait; skels hit them and die from the counterattack. Because of this, zombies go to them rather than the lizards. Gnolls move right up to the lizards.
3rd round: vamps fly to us, rags hit after the gnoll. Hit vamps so they are one cell away from the lizards; then vamps will bite the gnolls.
As a result, we have 3 vamps who will move first in the next round, and the rags are still in their place.
4th round: They (rags) then fly to us, but we finish off the vamps. Rags hit the gnolls (lizards ran away).
In the end, 18 lizards and about 35 gnolls remain, with zombies nearby. Run away from them and shoot.
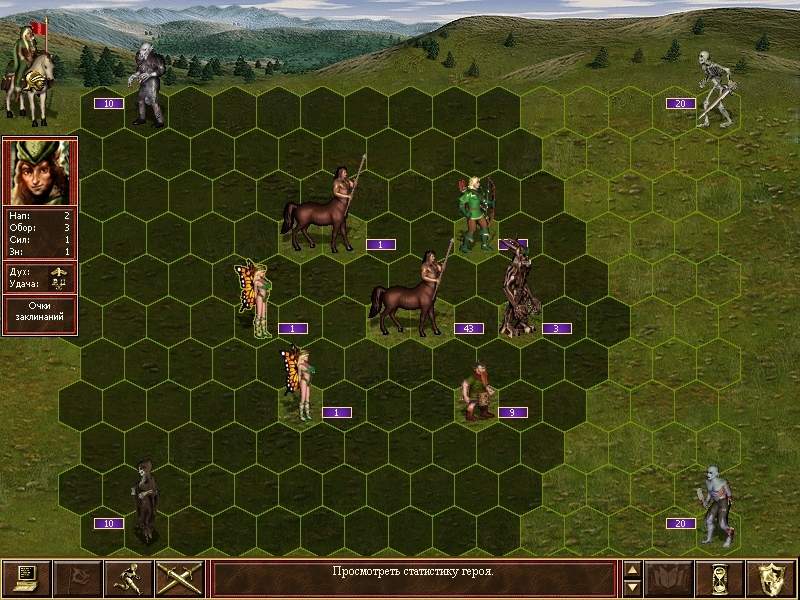
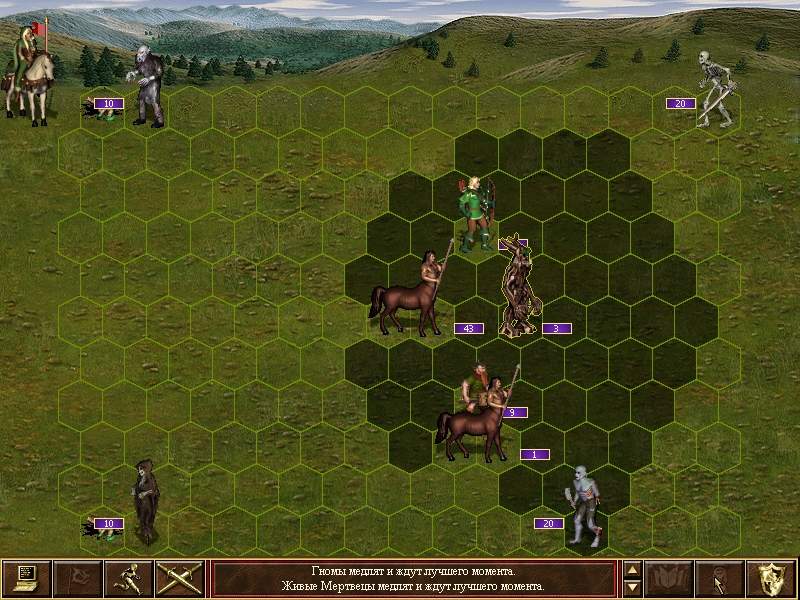
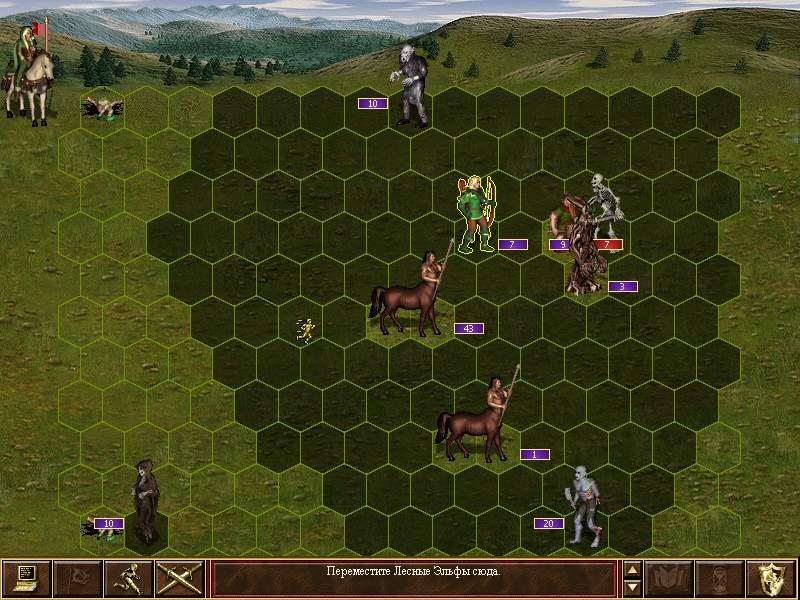
Taking a maximum crypt playing as Castle with 2 cavaliers and 4 swordsmen, hero 2-1-1-1, magic: bloodlust twice. One horse must remain. Battle description author-Gynnar
The battle itself
First turn - horses hit the witches (so that maximum damage is dealt), vampires fly to the knights, knights move down 5 cells from the witches, witches hit the knights - 4 of them remain (though luck affects this here; more might remain, which would be very bad, as you won't be able to avoid the counterattack from vamps with swordsmen later and they will die sooner), skeletons and zombies plod toward the knights.
Second turn - horses wait, vampires fly to the knights, knights hit witches (as close as possible on the left, so that skeletons and zombies don't reach them in 2 turns) (1 witch should remain), witches attack knights and die, zombies and skeletons crawl to the knights, bloodlust is cast on the horses, they hit vamps from above (killing 1.5 of them).
Third turn - Horses run up and left 7 cells away from vamps, vamps hit knights, knights run as far left as possible, skeletons and zombies plod toward them.
Fourth turn - Horses wait, vamps hit knights - one knight remains with life from 1 to 10 HP, he waits, skeletons and zombies crawl to him, then the knight hits the vamps and dies, bloodlust is cast on the horses, and they hit the vamps.
And after that, either on the 4th turn or in the next couple of turns, there should be morale (otherwise the battle is lost), tactic - horses run from skeletons, zombies, and vamps; you don't need to run long while waiting for morale, as it's very dangerous because they can pin you down quickly, so once you've run far enough that zombies and skeletons don't reach, wait with horses, vamps hit, skeletons and zombies crawl up, hit the vamps, then repeat the same thing again; vamps die, I had two horses left with about 18 HP and 20 skeletons with zombies. Hit skeletons from wait - 8 of them remain, my 2 horses have 8 HP, I finish them off on the next turn, and then run with horses so as to hit zombies from wait with maximum damage (upper max damage should be 51), morale is absolutely not needed here (and I didn't have any more), hit-hit the zombies, running in a circle countless times, and eventually kill them; one horse has 23 HP left after victory.
Well, overall Duke is right, that with such an army and such skills you shouldn't go into the crypt, there's a very high chance of failure.
"Taking a maximum crypt for Tower on the first day of the game, author-CB-Duke
Gremlins in the 4th stack, other slots - gargoyles; if you have golems - second stack. Then - two ones of gargoyles from positions 1 and 3 are placed against vampires in the corner, the stack flies to the bottom row 4 cells away from zombies, golems fight skeletons, or a gargoyle waits and is placed against skeletons. If there are about 10 gargoyles - you can finish off witches with them in the third round; gremlins don't always kill exactly.
This layout is for all castles - shooters in the 4th slot, ones slow down vampires, witches, vampires, and skeletons are killed, and zombies are chased in a circle.
First, witches are killed with two shots, then vampires.
Alternative layout - gremlins in the second stack, top right corner is closed by golems and gargoyles - this is for cities where there's no possibility to get speed 7 in the crypt.
A magnificent example, very detailed turn-by-turn, on how to take a MAXIMUM dwarf hold playing as Stronghold in the first week (in the first half, before building bears (actually, it is taken specifically for building bears)). A real battle conducted while playing online-Forrest, battle description-Antoshka
Army: 23 orcs. 3 ruhs. 45 gobs. Jabarkass (orc spec) 6-2-1-1 Expert archery and attack; goal - take a maximum dwarf hold (30 dwarves per pack) in the first days of the game.
Overall, it is very, very difficult to account for the influence of morale in the record... therefore the battle will proceed without morale... i.e., this record was made without morale... although the tactic is very good and also gives excellent results with morale... those interested can check.
Battle priorities:
1. A full stack of dwarves hitting an orc stack = GG.
2. Losing 2 orcs in this battle is worse than losing a ruh.
3. Losing a ruh is worse than losing 10 goblins.
4. It's better to take a hit on a ruh and lose no one than to take a hit on a goblin and lose 1 goblin.
Consequences:
1. With dwarf morale and if an orc stack is threatened, we push heavily onto that stack.
2. It's better to distract with goblins rather than ruhs.
3. Since there aren't enough arrows for everyone... we distribute them as follows: 2.2.2.4.2. Less on the last stack than on the penultimate one, since orcs can already fight hand-to-hand and their hit is strong enough.
Conventional designations.
To be honest, I've never liked chess notation... well, I just don't like using the Latin alphabet for calculations :(.
Therefore coordinates will be designated by numbers (1.1) - bottom left corner. (15.1) - bottom right corner. (1.11) top left corner. (15.11) - top right corner.
"=" means movement. (G1=(6.7) i.e., 1 goblin goes to point (6.7))
"/" - shooting (O23/(4.9) i.e., 23 orcs shoot at the stack standing at point (4.9)
"*" - hitting
"-", "+" - means total loss of our stack or enemy stack respectively. Ours "-" enemy "+"
w - waits.
d - stood in defense.
// turns that waited.
Example: R3=(4-5.10)*(4.9)+ i.e., 3 ruhs fly to two points (4.10) and (5.10) as it's a two-cell monster and hit the stack (4.9), where "+" means ruhs finish off this stack. If it doesn't matter how the monster stands, or if it doesn't move, coordinates of where it stands are not indicated. In this example, it would simply be R3*(4.9)+.
Example 2: G1*(3.4)- means one goblin hit a stack at (3.4) and died in the counterattack.
So: JABA level 5. 6.2.1.1. offense expert. archery expert.
Raids maximum dwarf hold without upgraded stacks on stones.
Army and layout:
O23.G1.G1.G41.G1.G1.R3.
1st Turn.
R3w.O23/(2.11).G1w.G1=(5.7).G41w.G1=(7.2).G1*(2.11)-
//G1=(6.7).G41=(3.9)*(4.9).R3=(5-6.10)*(4.9).
2nd Turn.
R3=(4-5.10)*(4.9).O23/(4.9).G1w.G1w.G41*(4.9)+.G1=(1.2)
//G1=(12.7).G1=(3.8).
3rd Turn.
R3=(1-2.10).O23=(1.11).G1=(14.4).G1w.G41=(2.11).G1=(1.8)
//G=(7.5)
4th Turn.
R3w.O23/(3.4).G1=(15.9).G1w.G41w.G1*(3.4)-
//G1=(3.1).G41=(1.7)*(2.7).R3=(1-2.8)*(2.7).
5th Turn.
R3*(2.7).O23/(2.7).G1=(15.7).G1w.G41*(2.7)+
//G1=(2.1)
6th Turn.
R3=(1-2.10).O23/(7.2).G1=(15.9).G1d.G41=(2.11).
7th Turn.
R3w.O23/(4.2). G1=(9.9).G1*(4.2)-.G41w
//G41=(4.5)*(5.5).R3=(4-5.6)*(5.5).
8th Turn.
R3*(5.5).O23w.G1=(12.3).G41*(5.5)+
//O23/(8.7)
At this stage, 3 stacks of dwarves have been destroyed. Two stacks remain, one of which has already been shot once. Further course of the battle doesn't need to be written... given possible morale outcomes. But since I started, I'll finish it.
9th turn.
R3=(1-2.10).O23/(8.7).G1=(7.1).G41=(2.11)
10th Turn.
R3w.O23w.G1=(2.2).G41w.
//O23/(6.4).G41d.R3d.
11th Turn.
R3w.O23/(6.4).G1=(11.8).G41w
//G41*(4.7)+.R3d.
12th Turn.
R3w.O23/(7.4).G1d.G41=(2.11)
//R3d.
13th Turn.
R3w.O23/(5.7).G1*(5.7)-.G41w//G41*(4.10).R3*(4.10).
14th Turn.
R3d.O23*(4.10)+. Win Battle !!!
Battle result: 150 dwarves were destroyed in an unequal fight. Losses amounted to 4 brave goblins. Their death was not in vain. Let us bow our heads in memory of the valiant warriors who have passed into the other world.
Analysis of events: if by the 9th turn dwarves don't get morale, the outcome is highly probable with losses of 4 goblins. If morale occurs in the first turns... then due to an emergency situation, a ruh or goblins will have to be sacrificed. And there is also a 4% probability that the far top-left stack gets morale on the first turn... then GG.
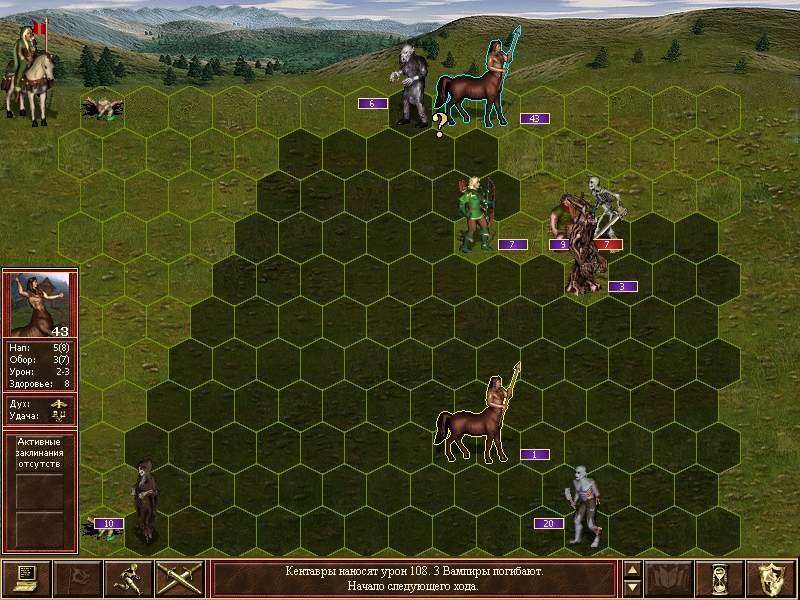
Taking maximum griffon hold (40 griffons per pack) for Rampart in the second week, author-Forrest
We have Ivor level 5. Expert shooting expert attack. 3-6 (attack/defense).
Attacking a maximum griffon hold with upgraded units.
Not on grass. IMHO this is not critical.
Army.
1 centaur 9 dendroids
70 centaurs 6 uniques 1 centaur
30 elves 20 dwarves (if layout changes, griffs immediately kill elves.)
(Stacks are a bit fat. It's a max hold, what did you expect?)
But the army is real, taken from a real game without growth. )
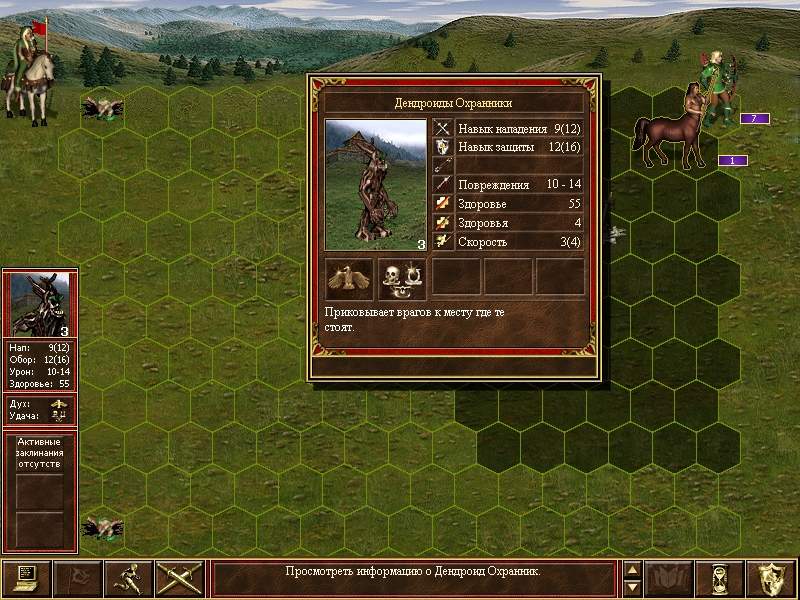
1st round. White griffons attack centaurs (minus 20). Move with elves left-down. Unicorns opposite elves one cell away (don't reach in close contact). Top right griffons kill wood (minus 2); stand with the top left one next to top left griffons. Main centaurs move (50 remain), cover elves in bottom left corner. Bottom right griffons attack dwarves (minus 7). Top left griffons kill the one. Last pack of griffons kills wood (-2). Wood-defense. Dwarves as close as possible to unicorns.
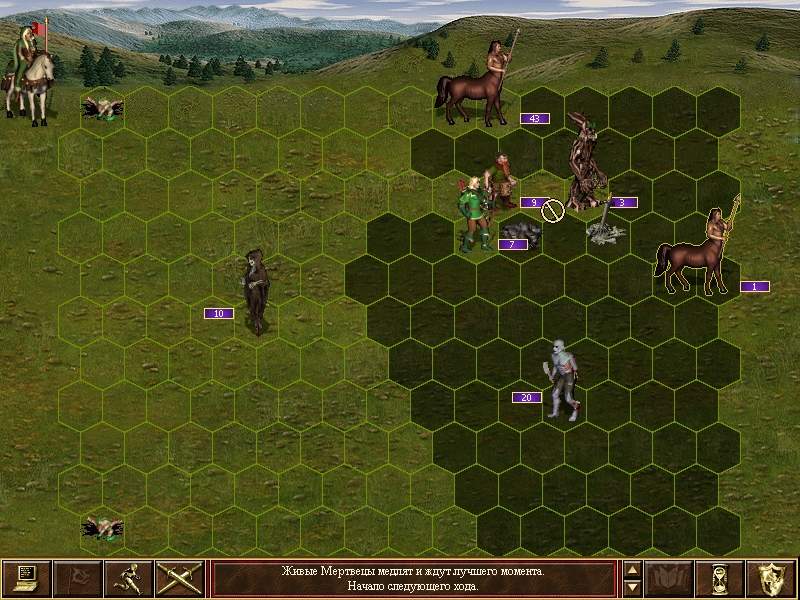
2nd round. White griffons kill wood (minus 2). Elves - shoot top left ones (damage over 400). Wait with uniques. Centaurs defense. The pack of griffons that hit dwarves in the 1st round kills them too. Our last one moves, close to wood between griffons that attacked wood. Top lefts fly to center. Griffons kill the last one. Others kill wood (minus 2) (one dendroid remains). Kill nearest simple griffons with uniques (thanks to the fact that the last dendroid survived and holds the whites).
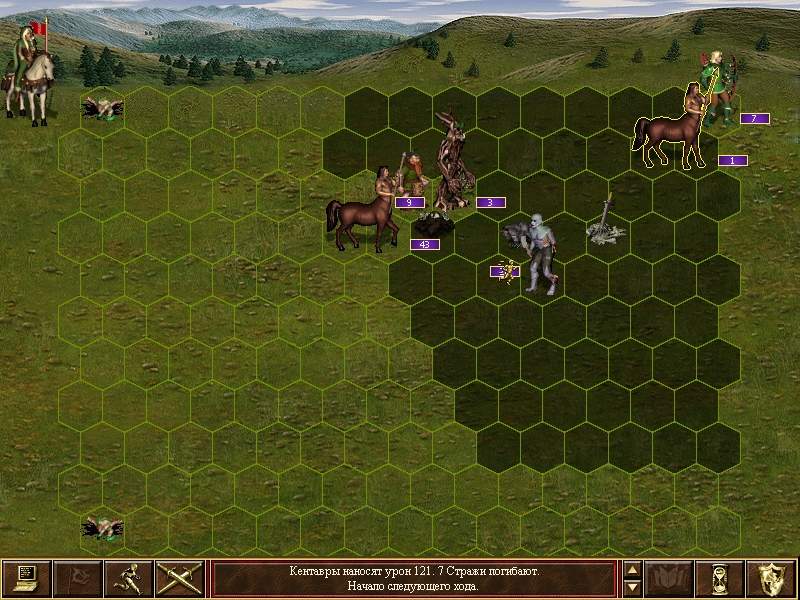
3rd round. Whites kill the last dendroid, freeing everyone. (We have elves covered by horses 50 pcs, uniques 6 pcs, (covering now after elf turn)). Factually the battle is already won. Using a known method, without killing nearest griffons completely. Main thing is to save centaurs (i.e., first kill those who damage them). With blind, the battle is won without any problems (its probability is high and simplifies everything even once per battle).
Estimated losses: 3-4 unicorns. All centaurs. All dwarves. All wood.
Addition from Gynnar - This tactic is universal for all nations where one of the combat stacks are shooters (i.e., by the same principle you can break holds on the second week playing as Tower, Castle, just not such large ones, since these castles don't have such a fat 5th level as elves).
Taking a three-stack hold (with 3 angels) at the start of the second week, playing as Stronghold, only with native troops. Author-Gynnar
This castle is Stronghold, troops and skills are quite real, from one of my games.
Hero-Gundula, skills-6.6.2.3 (from artifacts - shield +4, given in wagon), entered doubler - mana 60, level 7, skills - expert wisdom, expert attack and advanced earth :( , only slow in the book
army
3 bears 1 wolf
108 upgraded goblins 9 thunder birds 1 wolf
24 wolves 1 wolf
From dwellings - only one - goblins; wolves and bears are not upgraded.
Hold is a three-stack, with an upgraded stack, my first turn: Thunder birds hit the upgraded pack - it kills one bird and flies to hit wolves (16 wolves remain), slow is cast on the pack in top left corner, goblins hit the upgraded pack from below, bears finish it off (from below), one wolf runs down and stands next to goblins, one in the middle runs right and stands below 7 cells away from the top right griffon pack, one at bottom runs right and stands close to the pack in bottom right corner, wolves-wait, griffons from top right fly down, from top left - also down and slightly sideways, packs in middle and bottom right hit ones, wolves run up and stand 6 cells from top right corner. Second turn: Slow on the griffon pack closest to top right, wait with birds, bears, goblins, and one runs to the bottom right pack, wolves wait, griffons at bottom left hit the one and two packs fly to wolves (don't reach), pack from right flies down and hits goblins, bears hit this pack, then goblins and birds finish it off, wolves shift two cells left. Third turn: Everyone waits and slow is cast on the pack closest to wolves, two packs from top fly to wolves, pack from bottom right corner flies to middle, bears hit it (they have 96 HP left), goblins and birds - after this 2 griffons remain, wolves run forward right along the top row. Fourth turn: Slow on the dispelled pack, thunder-birds fly to bottom left corner, goblins and bears go slightly below middle on the left, wolves run as far as they can down-right, 2 griffons hit wolves and die, one pack flies to wolves, another to others. Fifth turn: Everyone waits, slow is cast on the dispelled pack, one pack flies left, another flies to wolves, bears hit a pack (47 hp remains), goblins hit it and birds, 5 griffons remain, wolves run 4 cells along bottom row from right corner. Sixth turn: Birds finish off griffs, bears and goblins stand in place (defense pressed just in case), wolves run 7 cells along bottom row (slow on remaining pack). Seventh turn: Everyone waits, last pack of griffons flies to wolves, wolves hit it (2 remain), bears-defense, goblins hit it - 18 remain, birds hit, 14 griffons remain. Eighth turn: Birds pass, goblins pass, bears hit and finish off griffons. THAT'S ALL... Remaining army - 3 bears, 8 thunder-birds, 18 upgraded goblins, 2 wolves - and, of course, 3 angels...
Also much useful information on what deadlines you can break various buildings (Dragon Utopia, holds, etc.) can be found by reading party reports between online players at heroes.by
Added after 20 hours 4 minutes
How to take a maximum crypt with Tazar level 9, skills 2 9 2 1 (without artifacts and book, acquired skills logistics and earth), with an army of 20 lizards, 5 gnolls, 2 wyverns, 3 or 4 flies, on snow; goal - save wyverns and, if possible, lizards. Battle description-author (Antoshka)
layout:
1 gnoll. 20 lizards. 1 mosquito. 4 gnolls. 2 wyverns. 1 mosquito. 1 mosquito.
1st round.
Mosquito flies to bottom left, so that vamps can reach it there, by the left wall.
Second mosquito flies and stands before zombies, but so they don't reach; it's important that zombies move along the bottom row.
Third mosquito waits, wyverns wait,
vamps hit mosquito №1 and kill it. Rags fly to center, not reaching anyone... here there is some ambiguity... they might fly top or bottom, but this won't affect the outcome of the battle.
1 gnoll takes the counterattack from rags. (-1 gnoll)
Skeletons stand right in front of wyverns.
20 lizards shoot at rags.
4 gnolls hit rags from the vamp side (setup for vamps next turn). It's important that gnolls stand as far as possible from archers.
Zombies crawl to mosquito.
Wyverns hit rags. Mosquito also hits rags. It is important that 4 rags remain!!!
2nd round.
If there are still 5 rags... finish off 1 with the mosquito.
Second mosquito stands before zombies (this if rags went top; if bottom, then zombies will go bottom and won't leave the bottom edge, so you can just wait)
Wyverns hit skeletons; 11-12 skeletons remain.
Vamps hit 4 gnolls. Rags hit lizards, who kill 1 in counterattack. 20 lizards move to top edge and stand 5 cells before skeletons (topmost 7th cell from right edge)
Skeletons hit wyverns; in counterattack 3-5 skeletons remain.
Zombies crawl along bottom edge.
If you waited with the mosquito, you can poke a skeleton.
3rd round.
Mosquito stands in bottom row, 6th cell from left.
Second mosquito stands in bottom right corner.
Wyverns hit rags so that vamps don't reach them. 0-1 rag remains.
Vamps hit mosquito, rag (if survived) hits lizards and dies in counterattack.
Lizards shoot at vamps. Skeletons hit wyverns and die in counterattack.
Zombie goes to mosquitoes.
4th round.
Mosquito takes the counterattack from vamps (8-9).
Wyverns wait. Vamps fly toward wyverns, but don't reach.
Lizards shoot at vamps (7)
Zombies (20) crawl up.
Wyverns hit vamps (5-6) from below, but so that zombies are 1 cell away from reaching.
5th round.
Wyverns (2) hit vamps (4). Vamps hit lizards (18).
Lizards hit vamps (3)
Zombies (20) crawl to wyverns
6th round.
Wyverns hit vamps (2).
Vamps... they can hit either lizards or wyverns, but no longer kill anyone.
Lizards (18) hit vamps (1). Zombies crawl up.
7th round. etc. Fly apart, run away, finish off vamp and shoot zombies.
Result: crypt taken!. Losses: 5 gnolls, 3 mosquitoes, 2 lizards.
Remaining army: 18 lizards, 2 wyverns.
PS. This version is quite reliable... checked about 5 times..
Here is the method for swamp.
Tazar level 1. army: gnoll - fly - gnoll - 20 simple lizards - 43 gnolls -
gnoll - fly
In a max crypt on swamp, you lose 2 lizards, 8-12 gnolls, and two flies.
1st round: fly with the flies to the vamps and witches. They are killed by the 1st gnoll to the vamp, and 3rd and 6th to the rags (thus ensuring 2 rounds of vamps standing in place and 3 rounds for witches). With gnolls, wait and kill a pack of approaching skels (2-4 remain). Lizards into vamps.
2nd round: shoot at vamps. Gnolls wait; skels hit them and die from the counterattack. Because of this, zombies go to them rather than the lizards. Gnolls move right up to the lizards.
3rd round: vamps fly to us, rags hit after the gnoll. Hit vamps so they are one cell away from the lizards; then vamps will bite the gnolls.
As a result, we have 3 vamps who will move first in the next round, and the rags are still in their place.
4th round: They (rags) then fly to us, but we finish off the vamps. Rags hit the gnolls (lizards ran away).
In the end, 18 lizards and about 35 gnolls remain, with zombies nearby. Run away from them and shoot.
Taking a maximum crypt playing as Castle with 2 cavaliers and 4 swordsmen, hero 2-1-1-1, magic: bloodlust twice. One horse must remain. Battle description author-Gynnar
The battle itself
First turn - horses hit the witches (so that maximum damage is dealt), vampires fly to the knights, knights move down 5 cells from the witches, witches hit the knights - 4 of them remain (though luck affects this here; more might remain, which would be very bad, as you won't be able to avoid the counterattack from vamps with swordsmen later and they will die sooner), skeletons and zombies plod toward the knights.
Second turn - horses wait, vampires fly to the knights, knights hit witches (as close as possible on the left, so that skeletons and zombies don't reach them in 2 turns) (1 witch should remain), witches attack knights and die, zombies and skeletons crawl to the knights, bloodlust is cast on the horses, they hit vamps from above (killing 1.5 of them).
Third turn - Horses run up and left 7 cells away from vamps, vamps hit knights, knights run as far left as possible, skeletons and zombies plod toward them.
Fourth turn - Horses wait, vamps hit knights - one knight remains with life from 1 to 10 HP, he waits, skeletons and zombies crawl to him, then the knight hits the vamps and dies, bloodlust is cast on the horses, and they hit the vamps.
And after that, either on the 4th turn or in the next couple of turns, there should be morale (otherwise the battle is lost), tactic - horses run from skeletons, zombies, and vamps; you don't need to run long while waiting for morale, as it's very dangerous because they can pin you down quickly, so once you've run far enough that zombies and skeletons don't reach, wait with horses, vamps hit, skeletons and zombies crawl up, hit the vamps, then repeat the same thing again; vamps die, I had two horses left with about 18 HP and 20 skeletons with zombies. Hit skeletons from wait - 8 of them remain, my 2 horses have 8 HP, I finish them off on the next turn, and then run with horses so as to hit zombies from wait with maximum damage (upper max damage should be 51), morale is absolutely not needed here (and I didn't have any more), hit-hit the zombies, running in a circle countless times, and eventually kill them; one horse has 23 HP left after victory.
Well, overall Duke is right, that with such an army and such skills you shouldn't go into the crypt, there's a very high chance of failure.
"Taking a maximum crypt for Tower on the first day of the game, author-CB-Duke
Gremlins in the 4th stack, other slots - gargoyles; if you have golems - second stack. Then - two ones of gargoyles from positions 1 and 3 are placed against vampires in the corner, the stack flies to the bottom row 4 cells away from zombies, golems fight skeletons, or a gargoyle waits and is placed against skeletons. If there are about 10 gargoyles - you can finish off witches with them in the third round; gremlins don't always kill exactly.
This layout is for all castles - shooters in the 4th slot, ones slow down vampires, witches, vampires, and skeletons are killed, and zombies are chased in a circle.
First, witches are killed with two shots, then vampires.
Alternative layout - gremlins in the second stack, top right corner is closed by golems and gargoyles - this is for cities where there's no possibility to get speed 7 in the crypt.
A magnificent example, very detailed turn-by-turn, on how to take a MAXIMUM dwarf hold playing as Stronghold in the first week (in the first half, before building bears (actually, it is taken specifically for building bears)). A real battle conducted while playing online-Forrest, battle description-Antoshka
Army: 23 orcs. 3 ruhs. 45 gobs. Jabarkass (orc spec) 6-2-1-1 Expert archery and attack; goal - take a maximum dwarf hold (30 dwarves per pack) in the first days of the game.
Overall, it is very, very difficult to account for the influence of morale in the record... therefore the battle will proceed without morale... i.e., this record was made without morale... although the tactic is very good and also gives excellent results with morale... those interested can check.
Battle priorities:
1. A full stack of dwarves hitting an orc stack = GG.
2. Losing 2 orcs in this battle is worse than losing a ruh.
3. Losing a ruh is worse than losing 10 goblins.
4. It's better to take a hit on a ruh and lose no one than to take a hit on a goblin and lose 1 goblin.
Consequences:
1. With dwarf morale and if an orc stack is threatened, we push heavily onto that stack.
2. It's better to distract with goblins rather than ruhs.
3. Since there aren't enough arrows for everyone... we distribute them as follows: 2.2.2.4.2. Less on the last stack than on the penultimate one, since orcs can already fight hand-to-hand and their hit is strong enough.
Conventional designations.
To be honest, I've never liked chess notation... well, I just don't like using the Latin alphabet for calculations :(.
Therefore coordinates will be designated by numbers (1.1) - bottom left corner. (15.1) - bottom right corner. (1.11) top left corner. (15.11) - top right corner.
"=" means movement. (G1=(6.7) i.e., 1 goblin goes to point (6.7))
"/" - shooting (O23/(4.9) i.e., 23 orcs shoot at the stack standing at point (4.9)
"*" - hitting
"-", "+" - means total loss of our stack or enemy stack respectively. Ours "-" enemy "+"
w - waits.
d - stood in defense.
// turns that waited.
Example: R3=(4-5.10)*(4.9)+ i.e., 3 ruhs fly to two points (4.10) and (5.10) as it's a two-cell monster and hit the stack (4.9), where "+" means ruhs finish off this stack. If it doesn't matter how the monster stands, or if it doesn't move, coordinates of where it stands are not indicated. In this example, it would simply be R3*(4.9)+.
Example 2: G1*(3.4)- means one goblin hit a stack at (3.4) and died in the counterattack.
So: JABA level 5. 6.2.1.1. offense expert. archery expert.
Raids maximum dwarf hold without upgraded stacks on stones.
Army and layout:
O23.G1.G1.G41.G1.G1.R3.
1st Turn.
R3w.O23/(2.11).G1w.G1=(5.7).G41w.G1=(7.2).G1*(2.11)-
//G1=(6.7).G41=(3.9)*(4.9).R3=(5-6.10)*(4.9).
2nd Turn.
R3=(4-5.10)*(4.9).O23/(4.9).G1w.G1w.G41*(4.9)+.G1=(1.2)
//G1=(12.7).G1=(3.8).
3rd Turn.
R3=(1-2.10).O23=(1.11).G1=(14.4).G1w.G41=(2.11).G1=(1.8)
//G=(7.5)
4th Turn.
R3w.O23/(3.4).G1=(15.9).G1w.G41w.G1*(3.4)-
//G1=(3.1).G41=(1.7)*(2.7).R3=(1-2.8)*(2.7).
5th Turn.
R3*(2.7).O23/(2.7).G1=(15.7).G1w.G41*(2.7)+
//G1=(2.1)
6th Turn.
R3=(1-2.10).O23/(7.2).G1=(15.9).G1d.G41=(2.11).
7th Turn.
R3w.O23/(4.2). G1=(9.9).G1*(4.2)-.G41w
//G41=(4.5)*(5.5).R3=(4-5.6)*(5.5).
8th Turn.
R3*(5.5).O23w.G1=(12.3).G41*(5.5)+
//O23/(8.7)
At this stage, 3 stacks of dwarves have been destroyed. Two stacks remain, one of which has already been shot once. Further course of the battle doesn't need to be written... given possible morale outcomes. But since I started, I'll finish it.
9th turn.
R3=(1-2.10).O23/(8.7).G1=(7.1).G41=(2.11)
10th Turn.
R3w.O23w.G1=(2.2).G41w.
//O23/(6.4).G41d.R3d.
11th Turn.
R3w.O23/(6.4).G1=(11.8).G41w
//G41*(4.7)+.R3d.
12th Turn.
R3w.O23/(7.4).G1d.G41=(2.11)
//R3d.
13th Turn.
R3w.O23/(5.7).G1*(5.7)-.G41w//G41*(4.10).R3*(4.10).
14th Turn.
R3d.O23*(4.10)+. Win Battle !!!
Battle result: 150 dwarves were destroyed in an unequal fight. Losses amounted to 4 brave goblins. Their death was not in vain. Let us bow our heads in memory of the valiant warriors who have passed into the other world.
Analysis of events: if by the 9th turn dwarves don't get morale, the outcome is highly probable with losses of 4 goblins. If morale occurs in the first turns... then due to an emergency situation, a ruh or goblins will have to be sacrificed. And there is also a 4% probability that the far top-left stack gets morale on the first turn... then GG.
Taking maximum griffon hold (40 griffons per pack) for Rampart in the second week, author-Forrest
We have Ivor level 5. Expert shooting expert attack. 3-6 (attack/defense).
Attacking a maximum griffon hold with upgraded units.
Not on grass. IMHO this is not critical.
Army.
1 centaur 9 dendroids
70 centaurs 6 uniques 1 centaur
30 elves 20 dwarves (if layout changes, griffs immediately kill elves.)
(Stacks are a bit fat. It's a max hold, what did you expect?)
But the army is real, taken from a real game without growth. )
1st round. White griffons attack centaurs (minus 20). Move with elves left-down. Unicorns opposite elves one cell away (don't reach in close contact). Top right griffons kill wood (minus 2); stand with the top left one next to top left griffons. Main centaurs move (50 remain), cover elves in bottom left corner. Bottom right griffons attack dwarves (minus 7). Top left griffons kill the one. Last pack of griffons kills wood (-2). Wood-defense. Dwarves as close as possible to unicorns.
2nd round. White griffons kill wood (minus 2). Elves - shoot top left ones (damage over 400). Wait with uniques. Centaurs defense. The pack of griffons that hit dwarves in the 1st round kills them too. Our last one moves, close to wood between griffons that attacked wood. Top lefts fly to center. Griffons kill the last one. Others kill wood (minus 2) (one dendroid remains). Kill nearest simple griffons with uniques (thanks to the fact that the last dendroid survived and holds the whites).
3rd round. Whites kill the last dendroid, freeing everyone. (We have elves covered by horses 50 pcs, uniques 6 pcs, (covering now after elf turn)). Factually the battle is already won. Using a known method, without killing nearest griffons completely. Main thing is to save centaurs (i.e., first kill those who damage them). With blind, the battle is won without any problems (its probability is high and simplifies everything even once per battle).
Estimated losses: 3-4 unicorns. All centaurs. All dwarves. All wood.
Addition from Gynnar - This tactic is universal for all nations where one of the combat stacks are shooters (i.e., by the same principle you can break holds on the second week playing as Tower, Castle, just not such large ones, since these castles don't have such a fat 5th level as elves).
Taking a three-stack hold (with 3 angels) at the start of the second week, playing as Stronghold, only with native troops. Author-Gynnar
This castle is Stronghold, troops and skills are quite real, from one of my games.
Hero-Gundula, skills-6.6.2.3 (from artifacts - shield +4, given in wagon), entered doubler - mana 60, level 7, skills - expert wisdom, expert attack and advanced earth :( , only slow in the book
army
3 bears 1 wolf
108 upgraded goblins 9 thunder birds 1 wolf
24 wolves 1 wolf
From dwellings - only one - goblins; wolves and bears are not upgraded.
Hold is a three-stack, with an upgraded stack, my first turn: Thunder birds hit the upgraded pack - it kills one bird and flies to hit wolves (16 wolves remain), slow is cast on the pack in top left corner, goblins hit the upgraded pack from below, bears finish it off (from below), one wolf runs down and stands next to goblins, one in the middle runs right and stands below 7 cells away from the top right griffon pack, one at bottom runs right and stands close to the pack in bottom right corner, wolves-wait, griffons from top right fly down, from top left - also down and slightly sideways, packs in middle and bottom right hit ones, wolves run up and stand 6 cells from top right corner. Second turn: Slow on the griffon pack closest to top right, wait with birds, bears, goblins, and one runs to the bottom right pack, wolves wait, griffons at bottom left hit the one and two packs fly to wolves (don't reach), pack from right flies down and hits goblins, bears hit this pack, then goblins and birds finish it off, wolves shift two cells left. Third turn: Everyone waits and slow is cast on the pack closest to wolves, two packs from top fly to wolves, pack from bottom right corner flies to middle, bears hit it (they have 96 HP left), goblins and birds - after this 2 griffons remain, wolves run forward right along the top row. Fourth turn: Slow on the dispelled pack, thunder-birds fly to bottom left corner, goblins and bears go slightly below middle on the left, wolves run as far as they can down-right, 2 griffons hit wolves and die, one pack flies to wolves, another to others. Fifth turn: Everyone waits, slow is cast on the dispelled pack, one pack flies left, another flies to wolves, bears hit a pack (47 hp remains), goblins hit it and birds, 5 griffons remain, wolves run 4 cells along bottom row from right corner. Sixth turn: Birds finish off griffs, bears and goblins stand in place (defense pressed just in case), wolves run 7 cells along bottom row (slow on remaining pack). Seventh turn: Everyone waits, last pack of griffons flies to wolves, wolves hit it (2 remain), bears-defense, goblins hit it - 18 remain, birds hit, 14 griffons remain. Eighth turn: Birds pass, goblins pass, bears hit and finish off griffons. THAT'S ALL... Remaining army - 3 bears, 8 thunder-birds, 18 upgraded goblins, 2 wolves - and, of course, 3 angels...
Also much useful information on what deadlines you can break various buildings (Dragon Utopia, holds, etc.) can be found by reading party reports between online players at heroes.by
Added after 20 hours 4 minutes
How to take a maximum crypt with Tazar level 9, skills 2 9 2 1 (without artifacts and book, acquired skills logistics and earth), with an army of 20 lizards, 5 gnolls, 2 wyverns, 3 or 4 flies, on snow; goal - save wyverns and, if possible, lizards. Battle description-author (Antoshka)
layout:
1 gnoll. 20 lizards. 1 mosquito. 4 gnolls. 2 wyverns. 1 mosquito. 1 mosquito.
1st round.
Mosquito flies to bottom left, so that vamps can reach it there, by the left wall.
Second mosquito flies and stands before zombies, but so they don't reach; it's important that zombies move along the bottom row.
Third mosquito waits, wyverns wait,
vamps hit mosquito №1 and kill it. Rags fly to center, not reaching anyone... here there is some ambiguity... they might fly top or bottom, but this won't affect the outcome of the battle.
1 gnoll takes the counterattack from rags. (-1 gnoll)
Skeletons stand right in front of wyverns.
20 lizards shoot at rags.
4 gnolls hit rags from the vamp side (setup for vamps next turn). It's important that gnolls stand as far as possible from archers.
Zombies crawl to mosquito.
Wyverns hit rags. Mosquito also hits rags. It is important that 4 rags remain!!!
2nd round.
If there are still 5 rags... finish off 1 with the mosquito.
Second mosquito stands before zombies (this if rags went top; if bottom, then zombies will go bottom and won't leave the bottom edge, so you can just wait)
Wyverns hit skeletons; 11-12 skeletons remain.
Vamps hit 4 gnolls. Rags hit lizards, who kill 1 in counterattack. 20 lizards move to top edge and stand 5 cells before skeletons (topmost 7th cell from right edge)
Skeletons hit wyverns; in counterattack 3-5 skeletons remain.
Zombies crawl along bottom edge.
If you waited with the mosquito, you can poke a skeleton.
3rd round.
Mosquito stands in bottom row, 6th cell from left.
Second mosquito stands in bottom right corner.
Wyverns hit rags so that vamps don't reach them. 0-1 rag remains.
Vamps hit mosquito, rag (if survived) hits lizards and dies in counterattack.
Lizards shoot at vamps. Skeletons hit wyverns and die in counterattack.
Zombie goes to mosquitoes.
4th round.
Mosquito takes the counterattack from vamps (8-9).
Wyverns wait. Vamps fly toward wyverns, but don't reach.
Lizards shoot at vamps (7)
Zombies (20) crawl up.
Wyverns hit vamps (5-6) from below, but so that zombies are 1 cell away from reaching.
5th round.
Wyverns (2) hit vamps (4). Vamps hit lizards (18).
Lizards hit vamps (3)
Zombies (20) crawl to wyverns
6th round.
Wyverns hit vamps (2).
Vamps... they can hit either lizards or wyverns, but no longer kill anyone.
Lizards (18) hit vamps (1). Zombies crawl up.
7th round. etc. Fly apart, run away, finish off vamp and shoot zombies.
Result: crypt taken!. Losses: 5 gnolls, 3 mosquitoes, 2 lizards.
Remaining army: 18 lizards, 2 wyverns.
PS. This version is quite reliable... checked about 5 times..