


 AstralLein

Auto-translated
This time, Aristarchus is not very lucky and he finds only two valuable crystals.
Warrior 3 uses the item Healing Potion
Warrior 3 recovers 40 health points
Warrior 3 uses the item Healing Potion
Warrior 3 recovers 35 health points
For the cost of 1 action point, Aristarchus and his last two companions reach a network of tunnels between the excavation site and the crystal cave. Here they are already met by a pack of Grubs.
THE BATTLE BEGINS
Round I
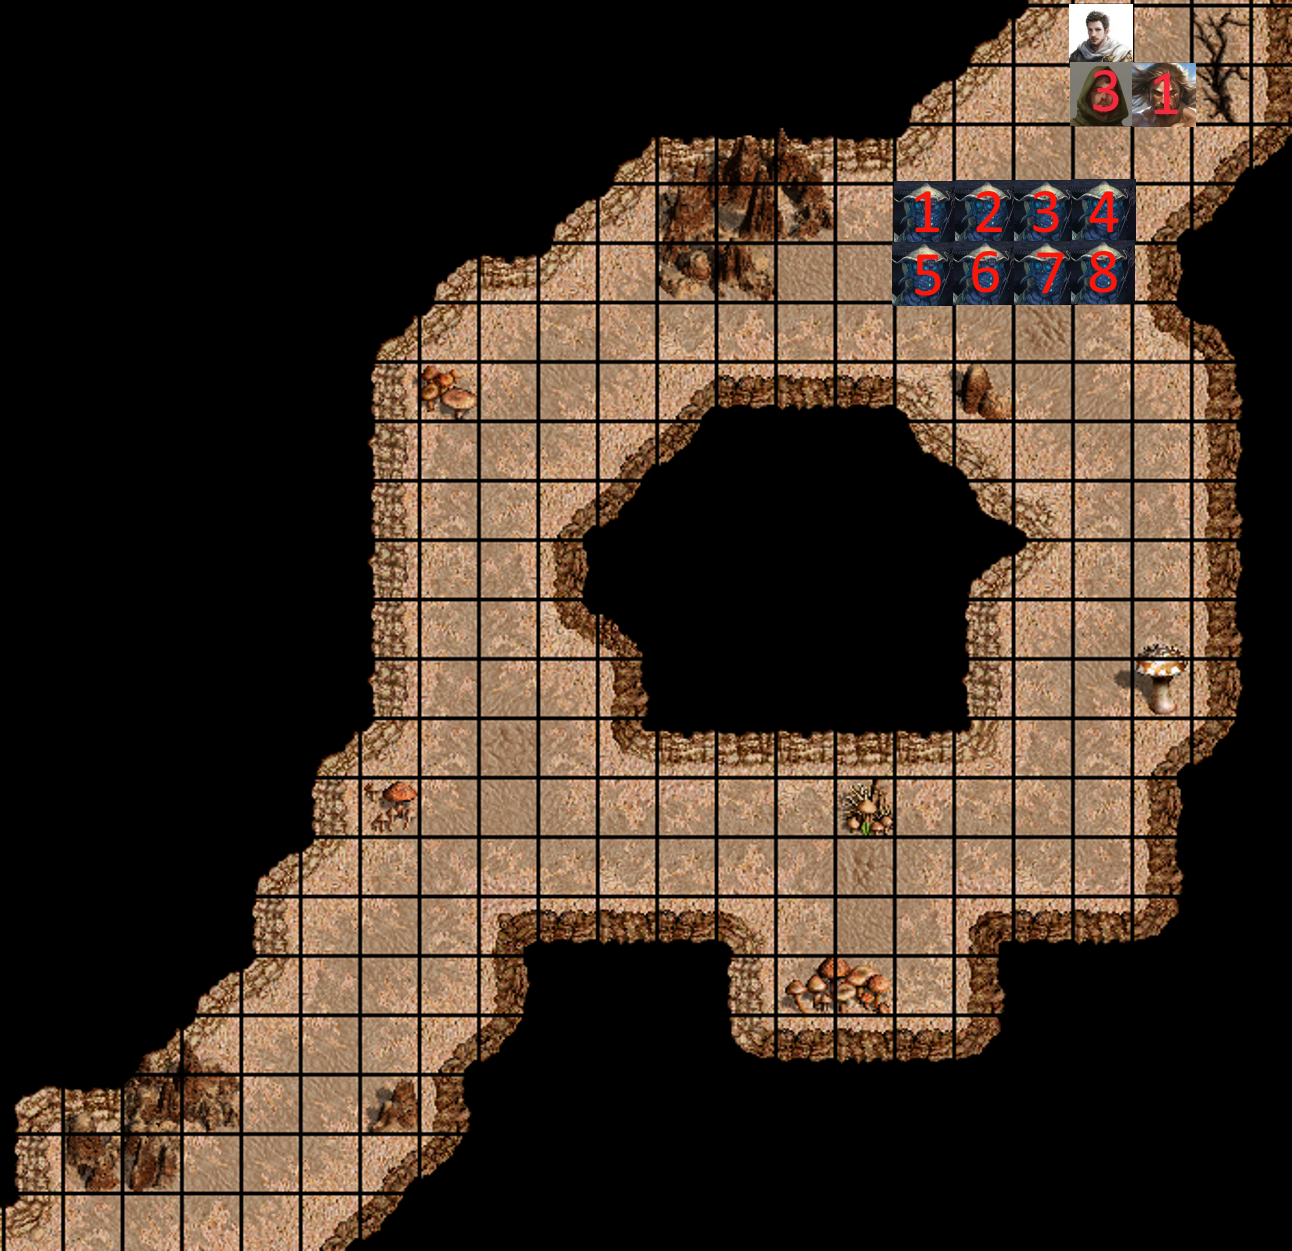
Turn order:
Fighter 1 [10] (110/110) (2 potions)
Warrior 3 [10] (80/80) (1 potion)
Aristarchus [10] (80/80) (3 potions)
Grub 1 [5] (30/30)
Grub 2 [5] (30/30)
Grub 3 [5] (30/30)
Grub 4 [5] (30/30)
Grub 5 [5] (30/30)
Grub 6 [5] (30/30)
Grub 7 [5] (30/30)
Grub 8 [5] (30/30)
Warrior 3 uses the item Healing Potion
Warrior 3 recovers 40 health points
Warrior 3 uses the item Healing Potion
Warrior 3 recovers 35 health points
For the cost of 1 action point, Aristarchus and his last two companions reach a network of tunnels between the excavation site and the crystal cave. Here they are already met by a pack of Grubs.
THE BATTLE BEGINS
Round I
Turn order:
Fighter 1 [10] (110/110) (2 potions)
Warrior 3 [10] (80/80) (1 potion)
Aristarchus [10] (80/80) (3 potions)
Grub 1 [5] (30/30)
Grub 2 [5] (30/30)
Grub 3 [5] (30/30)
Grub 4 [5] (30/30)
Grub 5 [5] (30/30)
Grub 6 [5] (30/30)
Grub 7 [5] (30/30)
Grub 8 [5] (30/30)