


 Gynnar

Auto-translated
No, actually, I meant the writing style and grammar...
I am certainly no Leo Tolstoy myself, but agree that any guide is much easier to read when it's written without slang and according to generally accepted language norms.
The same mentioned above undoubtedly represents huge value, but it's slightly unsystematized and composed a bit spontaneously. Now if everything were organized and a general system developed... :)
That's what I mean...
But otherwise—you are right, that's why I write illiteratey; thank you for the correct and justified reproach.
Added after 18 minutes
Yes, saves for examples would be very useful.
If possible—bring them on. Zip them right into this thread.
1) I not only don't know how to use Zip, but I don't even know what it is
(and I don't want to know, I don't need it and I'm not interested)
2) Which saves did you mean just now?
If you mean the battle saves for which examples were given—I have some of them, but these are only examples; by loading them, you can check and practice the tactics described above. I can send them to you if you provide your ICQ number, or you can post them here yourself, but it's easier to generate a random map for the faction described in the example, level up the hero as described, give him an army (the same as in the description)—and repeat everything laid out above (it's not very difficult to do, since many examples are shown either in the first days of the game or on the second week; enter a cheat code for infinite speed (to level up the hero in one day as in the example and find the required building for capture (crypt, gnome-mine, or can)) and that's it. If you know how to use the editor (I don't), then creating conditions identical to the example will be even easier for you.
3) If you mean saves between strong players—then look for them on Bay (in the "Real Patsany" tournament), contact Starik.
Or here are saves from a former world champion (Lord Dim) and Starik, posted day-by-day; try loading the next day's save and analyzing who rode where and why with their heroes to understand why it was done, and repeat the battles that were conducted (if possible, with similar losses). And a day-by-day description of what and how each hero did daily and WHY? from Starik's perspective can be read in the thread of the very first cup on the last page of heroes.by
Here is the link to game saves (day-by-day) between former world champion (Lord Dim) and Starik
http://mipt-anatole.narod.ru/final.html
Added after 34 minutes
Example of taking a Level 1 Crypt with 2-3-1-1, no books. 46 centaurs, 3 trees, 9 gnomes, 7 elves (basic) maximum crypt (with 10 vampires)
Kirryusha really wants to take the max crypt, but doesn't want to part with the centaurs. Author of the battle description and screenshots (Volodymyr—yes, yes, the same one who organizes the tournament between Heroeswold and heroes.by)
In my save there are two ones – fairies; I don't think this affects the layout.
Layout:
http://volodymyr-velykiy.narod.ru/Kript1.JPG
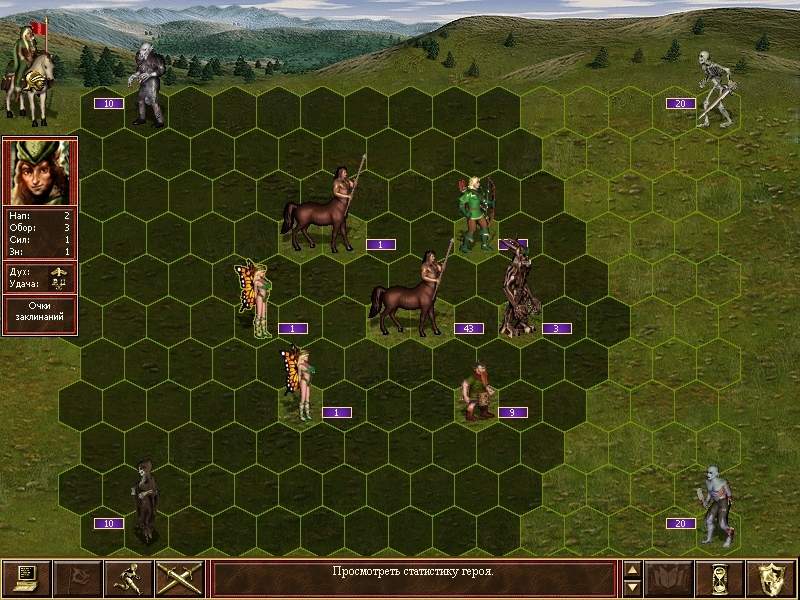
Round 1:
Fairy (slot 3) removes retaliation from vamps, fairy (slot 6) moves to rags, centaur (slot 1) runs bottom right, all others wait:
http://volodymyr-velykiy.narod.ru/Kript2.JPG
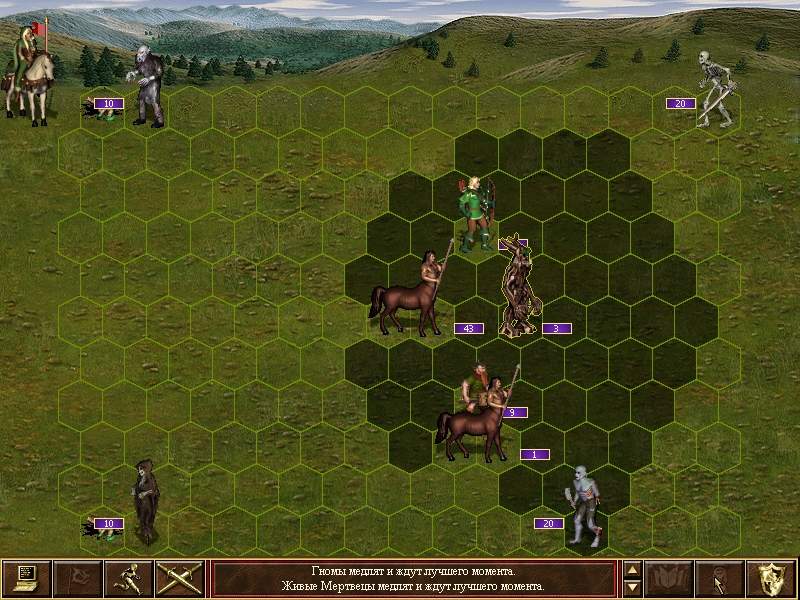
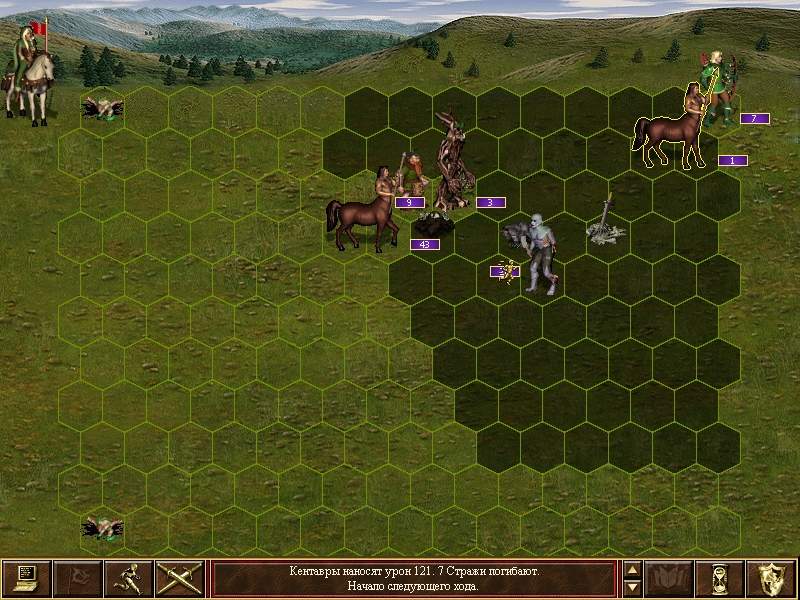
Trees go 2 cells up, right, so that skeletons hit them and gnomes can reach the skeletons. Elves hit vamps:
http://volodymyr-velykiy.narod.ru/Kript3.JPG
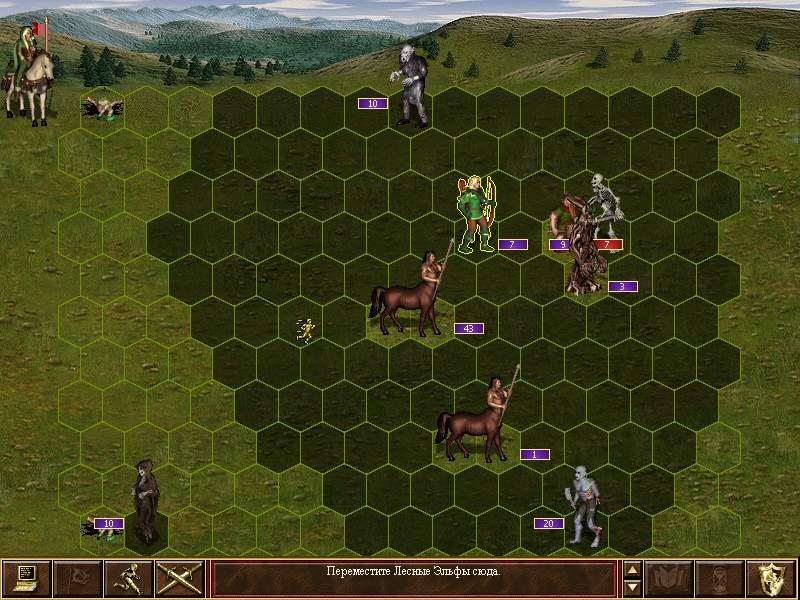
Main stack of centaurs – on vamps, but definitely from behind.
Round 2:
http://volodymyr-velykiy.narod.ru/Kript4.JPG
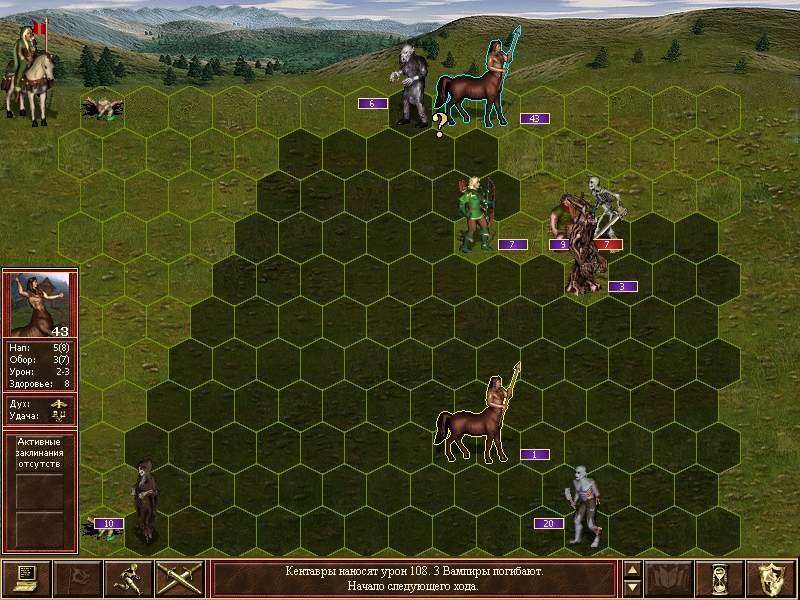
Centaur (slot 1) runs top right, elves hit vamps.
And here, luck is needed: the main stack of centaurs hits vamps so that only 1 bloodsucker remains, and specifically, so that this one vamp doesn't kill a centaur. Then the vamp hits gnomes, rags fly to the center, trees finish off skeletons, gnomes – the vamp.
Round 3:
http://volodymyr-velykiy.narod.ru/Kript5.JPG
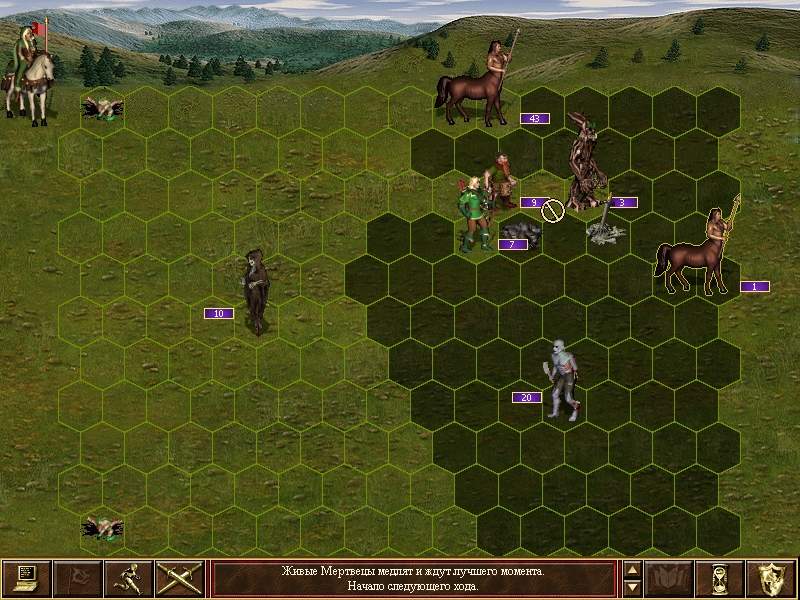
Centaur (slot 1) does whatever he wants, but so as not to die. Elves go top right, main stack of centaurs waits, trees hit rags (though if skeletons hit them hard enough, they might not survive the retaliation) http://volodymyr-velykiy.narod.ru/Kript7.JPG, gnomes also hit witches. Centaurs finish off rags.
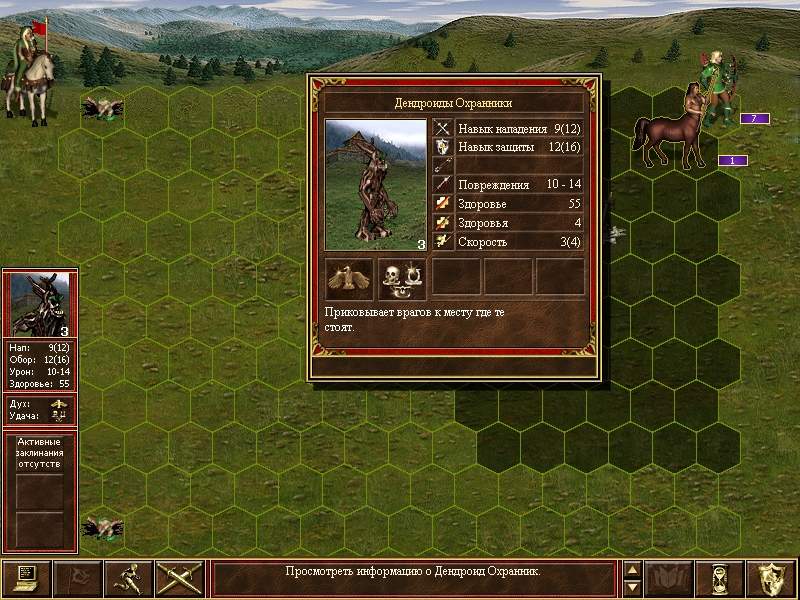
http://volodymyr-velykiy.narod.ru/Kript6.JPG
And as for shooting zombies, I think anyone can do that!
http://volodymyr-velykiy.narod.ru/Kript8.JPG
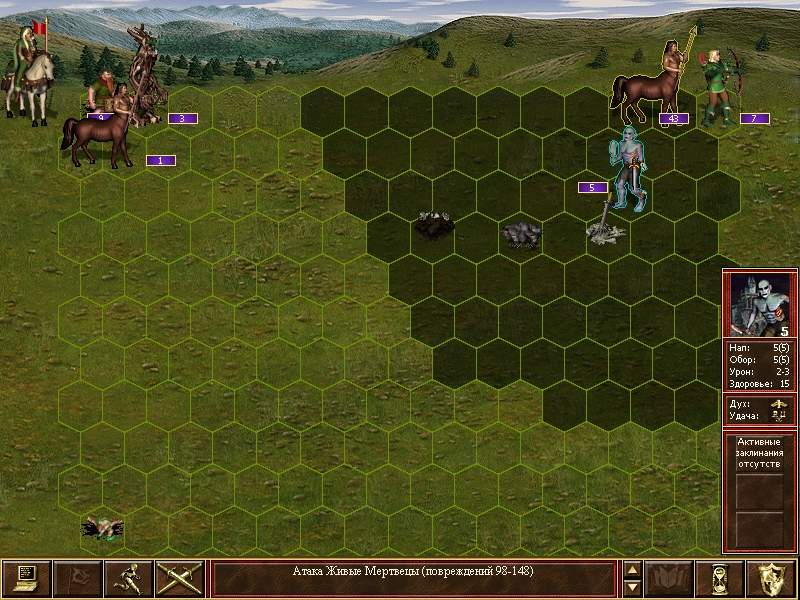
As we see, everything is real http://volodymyr-velykiy.narod.ru/Kript9.JPG, you just need a bit of luck. Of course, 2 vamps might remain or skeletons might heavily damage the trees. Rags hit back with 25 damage, so if the trees have less health left, it's better not to push in but think about how to finish the game; but as I say: "POSSIBLY, lose only 2 centaurs."
There is another way, but 3 centaurs are lost there, so I didn't describe it.
Same crypt, same army and hero, but the battle description is by author (Antoshka) (and without screens :smile05: )
99% way to lose only 2 centaurs and if unlucky (very unlucky) then 3 centaurs.
So, army: 46 centaurs, 3 logs, 9 dwarfs, 7 elves.
Layout: 1 centaur, 3 logs, 1 centaur, 9 dwarfs, 43 centaurs, 1 centaur, 7 elves.
Battle: turn 1.
Centaur removes retaliation from 10 vamps. (-1 centaur)
Second centaur stands at the very top (bait for vamps) so that vamps have to move 4 cells horizontally; then both logs and dwarfs will reach them.
43 centaurs wait, 1 centaur runs to elves and stands in the same row in front of them.
Elves wait
Vamps kill centaur #2 (-1 centaur)
Rags fly toward elves, but don't reach them and stand in the 3rd row from the bottom.
Logs bind vamps and stand in the very top row.
Skeletons go down to elves, zombies crawl along the very bottom row.
Dwarfs hit vamps so that space remains for centaurs to strike.
43 centaurs hit vamps there. And 7 elves shoot at vamps. 3-4 vamps remain there.
2nd turn.
43 centaurs hit vamps and kill them all (in my 7 attempts, they were killed at this stage all 7 times)
Centaur stands in the very top row in front of logs.
Elves stand where vamps were.
Rags fly up, but again don't reach
Logs hit and remove retaliation, killing 2 rags.
Skeletons move closer.
Dwarfs hit rags; 6 rags remain.
Zombies crawl along the bottom row (cannot seem to climb out of the trench)
3rd turn.
43 centaurs hit skeletons and kill them all (or 19 of them), it doesn't really matter...
1 centaur runs to zombies as a distraction, but so they can't reach him.
Elves shoot at rags; 4 remain.
Rags hit gnomes or trees (I had both) but cannot kill anyone anymore.
Logs and dwarfs finish off rags. Only 20 zombies left..
Further events develop less rapidly... but I think describing them is pointless
PS. Instead of centaurs, pixies could be used, then the loss is 2 pixies.
And morale might help us, but I wrote a reliable version.
PPS. Generally, the army is quite strong. In particular, the number of centaurs is quite impressive; it's not always that many. It's more relevant to lose gnomes rather than centaurs... then you need to manage differently.
PPS. By the way, I checked other crypts with such troops and layout. A 5-vamp one is taken with a loss of 1 centaur, others without losses.
Here is the link to screens on how to take a level 3 can for Castle on the second week:
(author—disly)
volodymyr-velykiy.narod.ru/kon.rar
There is no description; I can describe it in a few words. His layout is not entirely correct (if Tavern starts working, I will copy my description and layout for taking the level 3 on the second week from there); I would arrange them like this:
20 pikemen, 1 pikeman
50 marksmen, 6 frenzied horses, 1 pikeman
12 swordsmen, 1 pikeman
(I would give excess pikemen to another hero, because if there are many pikemen next to the marksmen, griffins will hit archers; this way they won't be touched (and leaving 10 pikemen in one stack on the right makes no sense, since whether it's 10 or 1 pikeman, 30 griffins kill them at once). Furthermore, it's strange why even single-unit griffins weren't taken instead of single-unit pikemen (and in the screen they aren't singles, but 10 each)
1 First turn—horses hit a pack of griffins bottom left (or bottom or top—doesn't matter), then the pack top right moves—hits one pikeman, next move marksmen wait, pack bottom right hits one, then pack bottom left moves—hits swordsmen, then pack top left moves—hits pikemen, after that the pack in the middle right moves—hits one, then swordsmen move—we go bottom left and stand so that griffins cannot fly to the marksmen standing in the corner, then the remaining pikeman stack moves—we press defense, then the waiting marksmen move—we go into the corner under the cover of horses and swordsmen
2 Well, after that, everything is clear. It's necessary to try to achieve this situation: marksmen in the corner shooting griffins, horses and swordsmen protecting them; it's necessary that the packs of griffs that flew to them are damaged but not killed completely, so they fight with swordsmen and horses while other full packs cannot get to them, and meanwhile shoot them down. Preferably, then shoot first the packs attacking swordsmen (and, naturally, don't hit with either horses or swordsmen, just press defense (only at the very end can you finish them off, or during the battle, but only if the stack is killed and not immediately replaced by another on this turn). The main thing—carefully monitor which pack moved first, which second, etc., and accordingly shoot down the packs most dangerous to the marksmen's cover based on this information.